For Threat Intelligence to fetch information and insights from sources, an initial setup where information such as the sources API name, API key and Base URL must be configured. The sources are Emerging Threats, Critical Stack, CSIS, Custom CSV, MISP, Blueliv, Recorded Future, and StixTaxii. You must also specify how to standardize the fetched information in Mapping and whether to assign a pseudoname to fields of the fetched information in Alias.
General Settings consists of all the details about the fetched data. You can find the most recent attempt made to fetch data in Last Fetch Attempt and the last date and time when data was successfully fetched in Last Fetch Date. The information of a disabled Threat Intelligence source is not displayed.
Go to Settings >> System Settings from the navigation bar and click Plugins.
Find Threat Intelligence and click Manage.
Select General Settings.
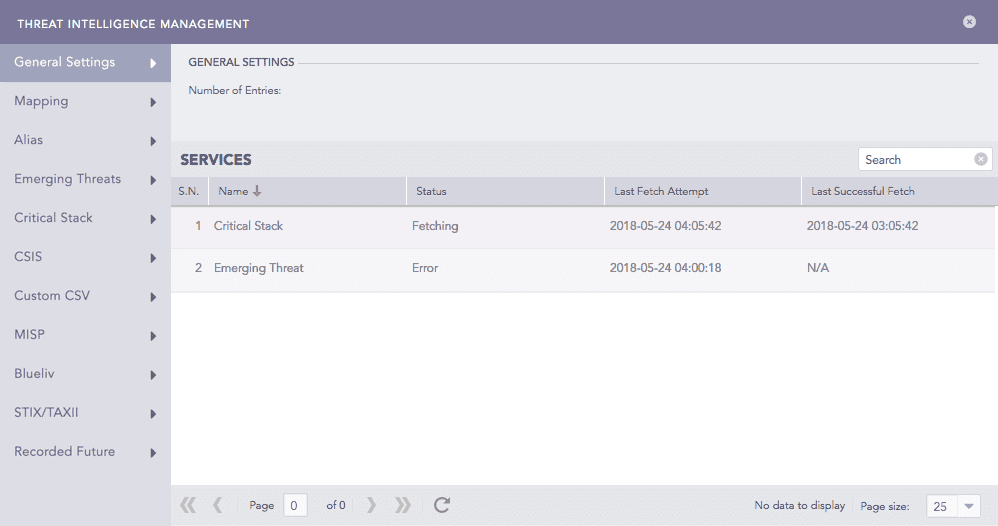
General Settings
To configure Emerging Threats, you must have the Base URL and API Key generated after Threat Intelligence data is configured on Emerging Threat.
Go to Settings >> System Settings from the navigation bar and click Plugins.
Find Threat Intelligence and click Manage.
Select Emerging Threats.
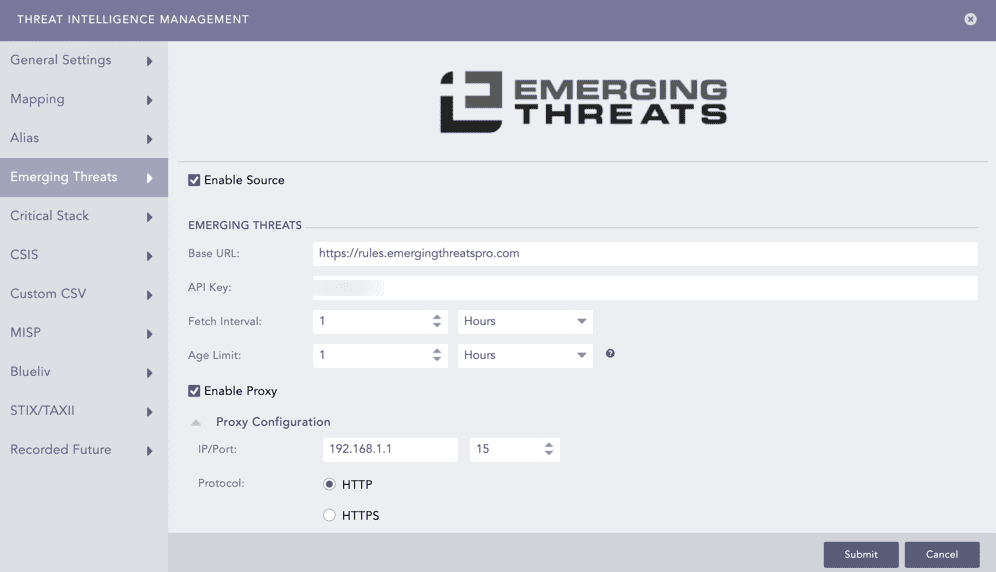
Select Enable Source to activate Emerging Threats.
Enter the Emerging Threats Base URL and API Key.
Select the frequency at which data is retrieved in Fetch Interval. It is measured in hours or days.
Select the Age Limit, which is the retention period of the fetched data in days or hours. Select it as 0 to retain the last fetched data until the next successful fetch.
Select Enable Proxy to use a proxy server.
In Proxy Configuration:
9.1. Enter the proxy server IP Address and Port number.
9.2. Select either HTTP or HTTPS protocol.
Click Submit.
Enabling Emerging Threats
Important
We will be removing the critical stack threat source from the upcoming version, so it is recommended to use the MISP threat source.
Go to Settings >> System Settings from the navigation bar and click Plugins.
Find Threat Intelligence and click Manage.
Select Critical Stack.
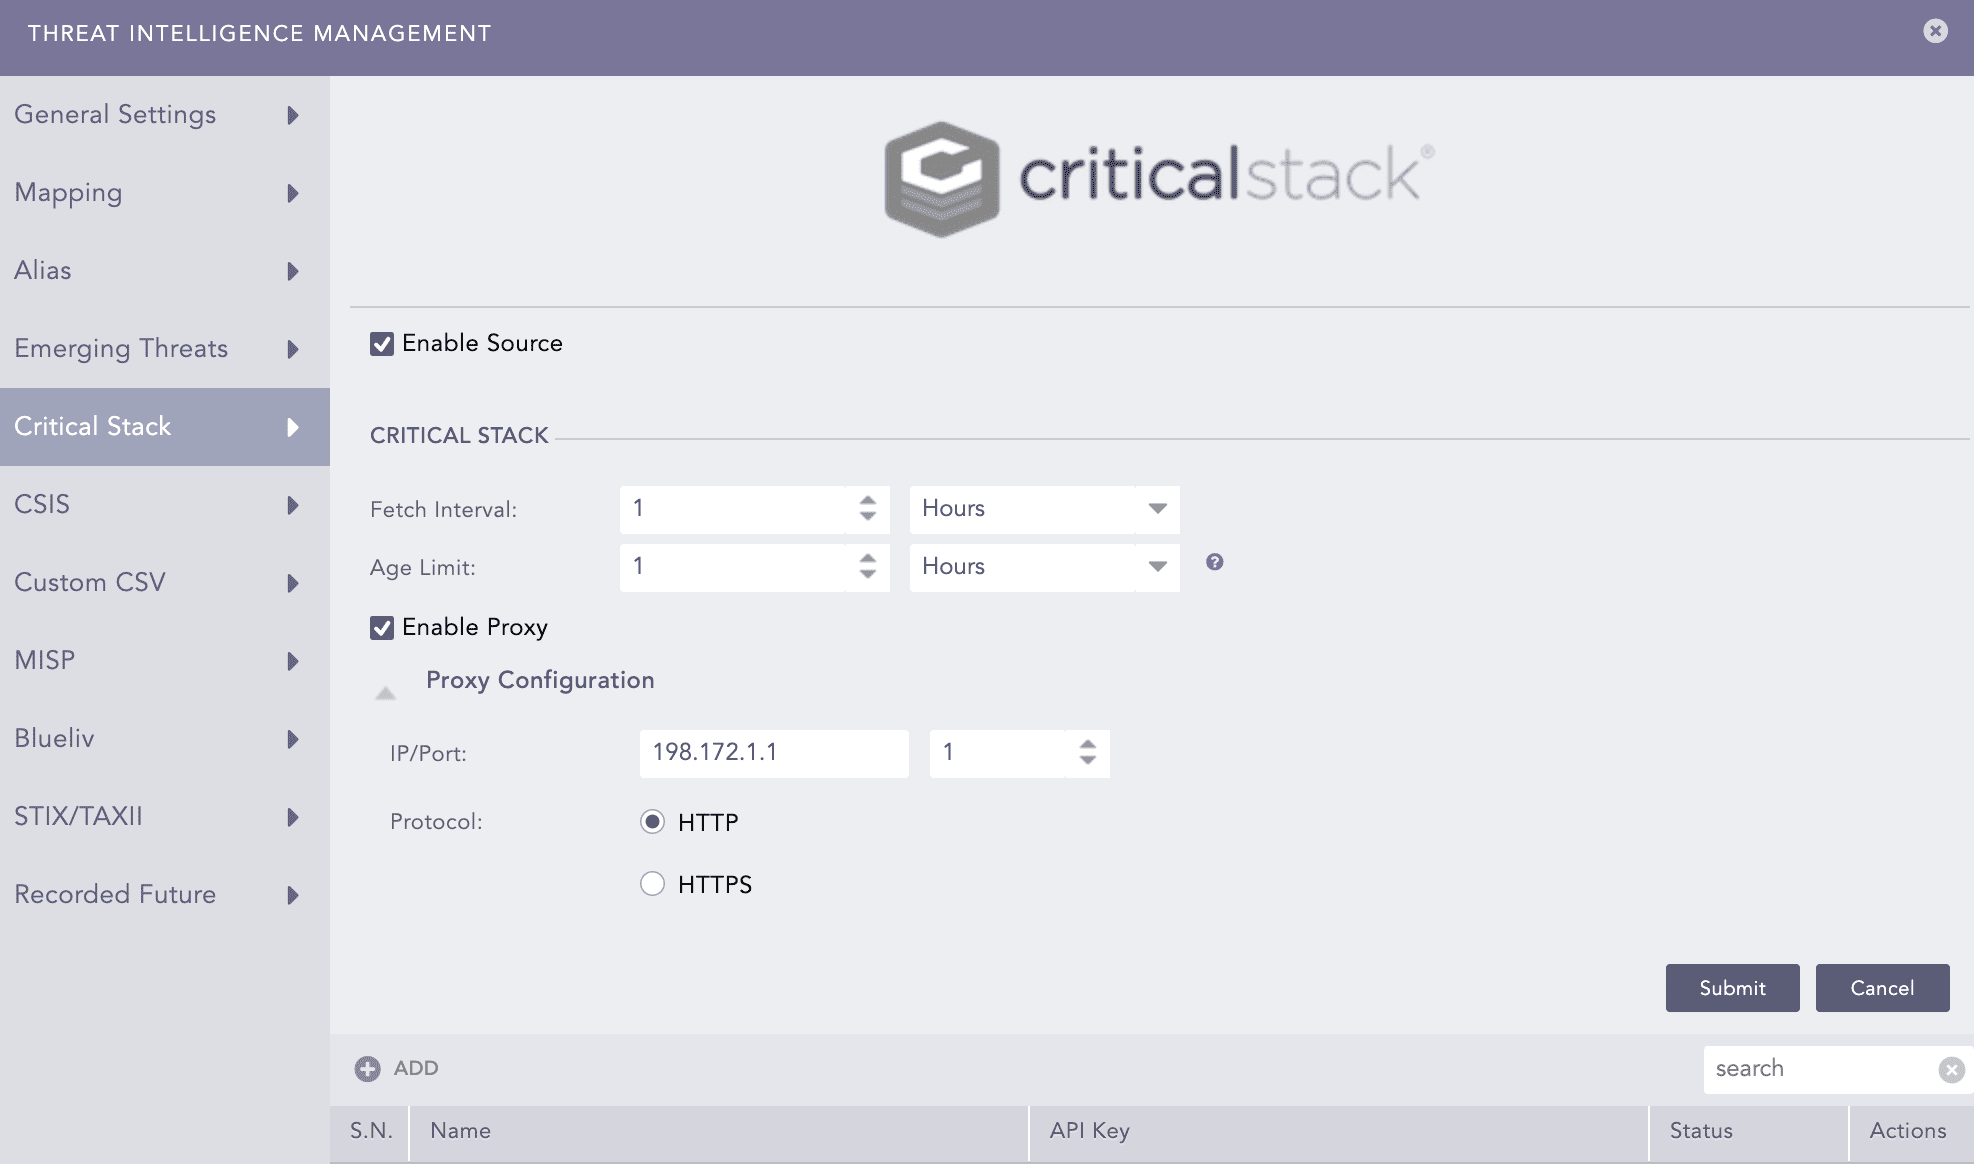
Select Enable Source to activate Critical Stack.
Click Add.
Enter the Critical Stack API Name and the API Key.
Click Submit.
Select the frequency at which data is retrieved in Fetch Interval. It is measured in hours or days.
Select the Age Limit, which is the retention period of the fetched data in days or hours. Select it as 0 to retain the last fetched data until the next successful fetch.
Select Enable Proxy to use a proxy server.
In Proxy Configuration:
11.1. Enter the proxy server IP Address and Port number.
11.2. Select either HTTP or HTTPS protocol.
Click Submit.
Enabling Critical Stack
To add multiple Critical Stack sources, click Add and enter their names and API keys. Fetch Interval and Age Limit must be same for all the sources. Add all the required APIs before clicking Submit as the APIs added after clicking Submit runs only after the current fetch interval.
Click the source Name to edit its parameters and click the delete ( ) icon to delete it.
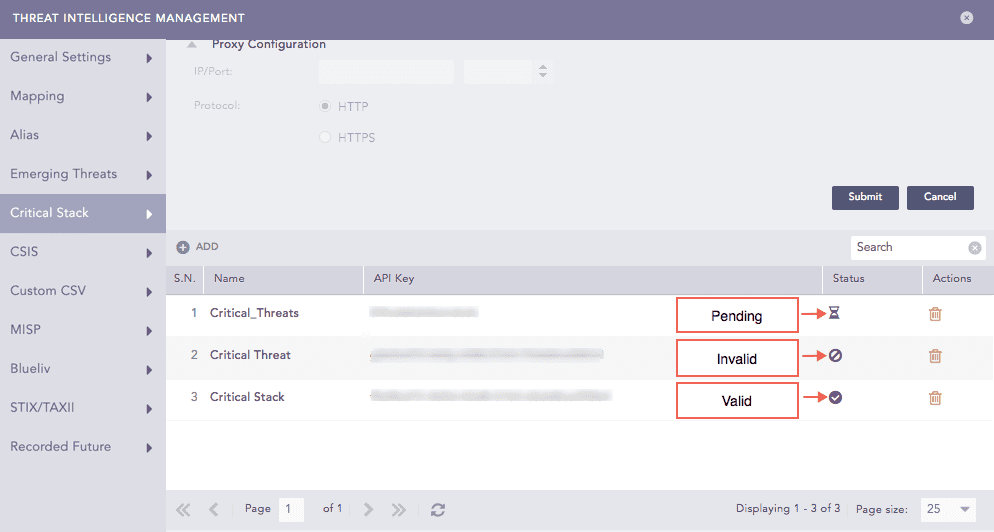
Critical Stack API Status
Go to Settings >> System Settings from the navigation bar and click Plugins.
Find Threat Intelligence and click Manage.
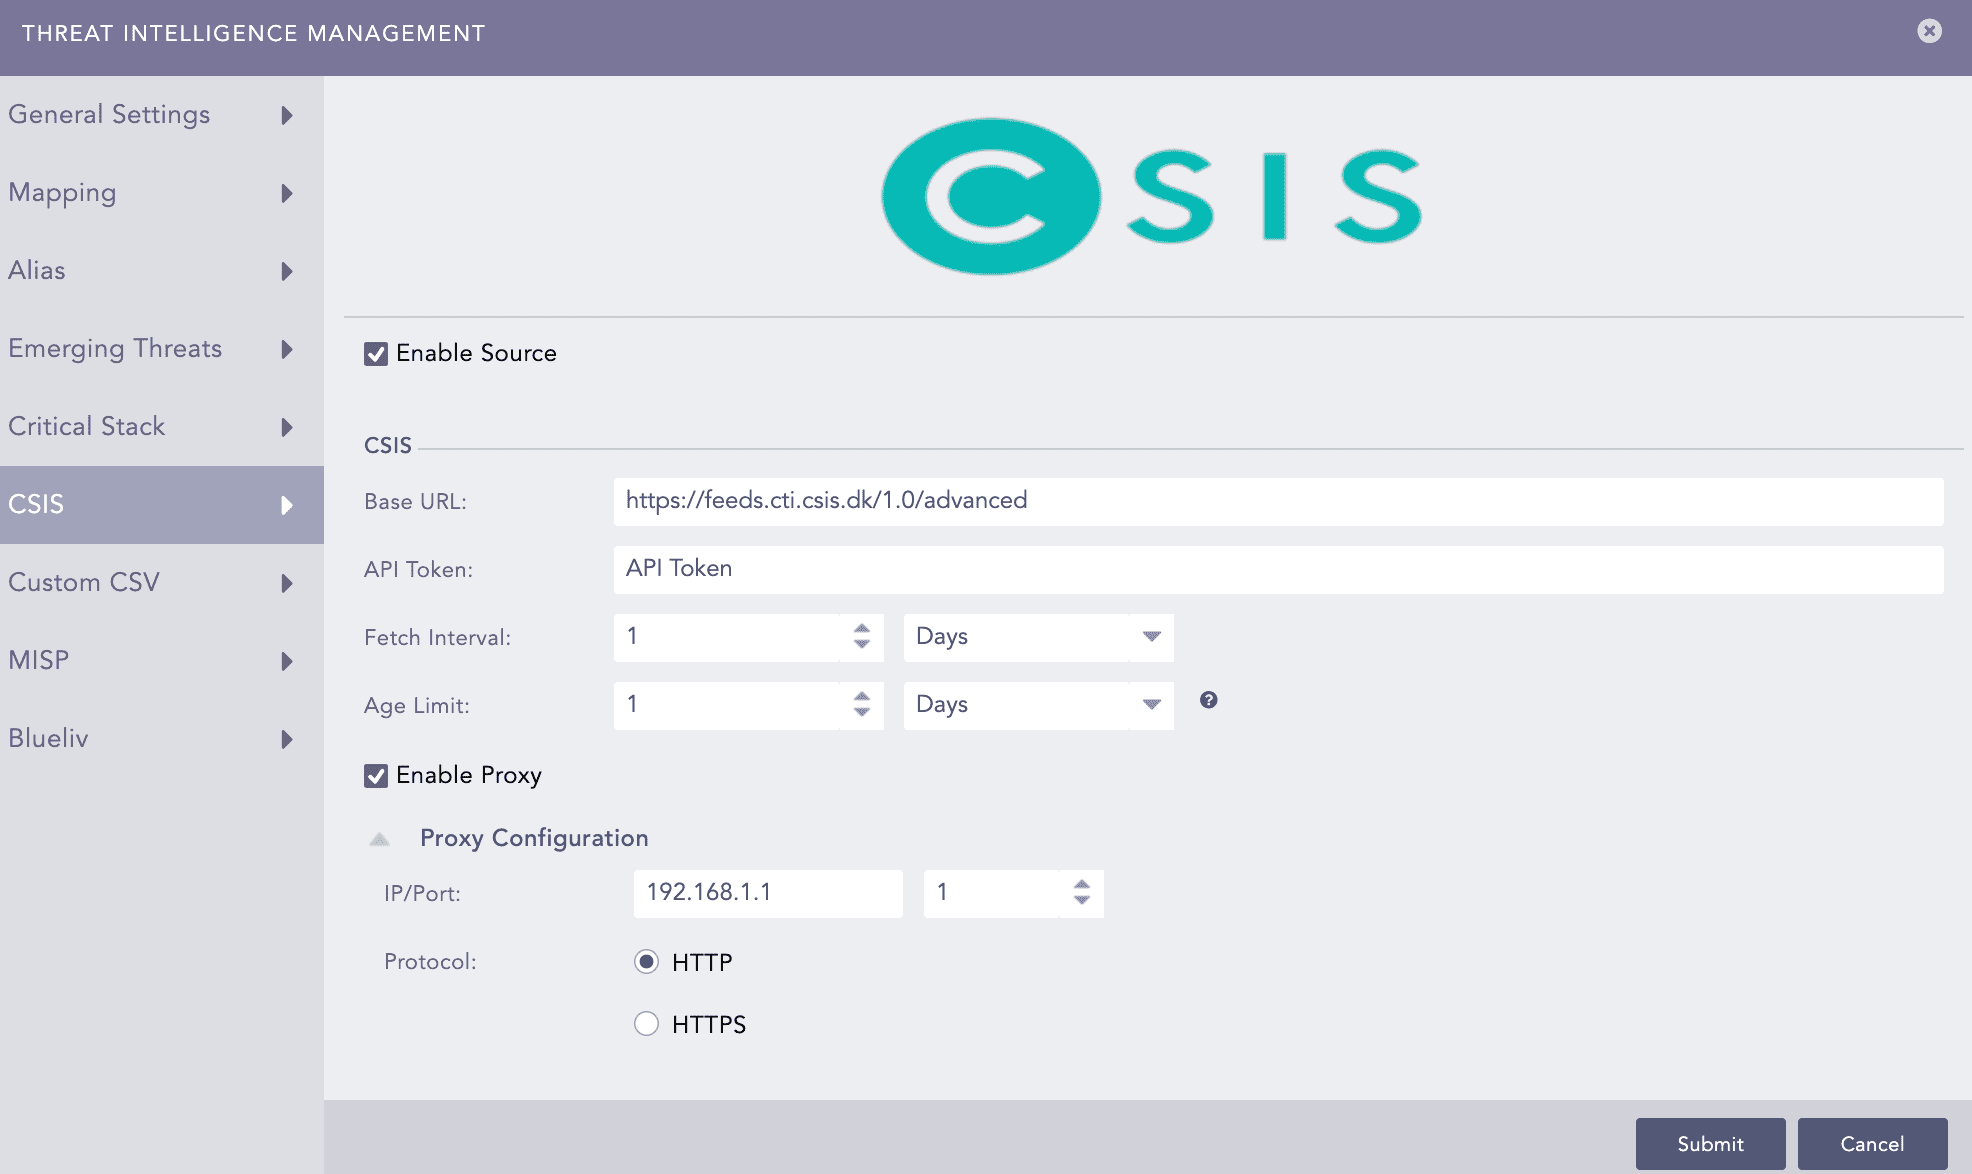
Select CSIS.
Select Enable Source to activate CSIS.
Enter the Base URL and API Token.
Select the frequency at which data is retrieved in Fetch Interval. It is measured in hours or days.
Select the Age Limit, which is the retention period of the fetched data in days or hours. Select it as 0 to retain the last fetched data until the next successful fetch.
Select Enable Proxy to use a proxy server.
In Proxy Configuration:
9.1. Enter the proxy server IP Address and Port number.
9.2. Select either HTTP or HTTPS protocol.
Click Submit.
Enabling CSIS
Custom CSV enables you to upload a custom CSV file as a TI source. The CSV file must have the following headers:
domain, category, score, first_seen, last_seen, ports, ip, url, type, file_hashNote
The field ports is optional. You can specify multiple ports by separating it with space.
The first_seen and last_seen data fields must have the yyyy-mm-dd format.
Threat Intelligence ignores fields and their values if the CSV is not in the above format.
To configure the Custom CSV:
Go to Settings >> System Settings from the navigation bar and click Plugins.
Find Threat Intelligence and click Manage.
Select Custom CSV.
Select Enable Source to activate Custom CSV.
Enter the Base URL. It must link to the custom CSV file.
Select the frequency at which data is retrieved in Fetch Interval. It is measured in hours or days.
Select the Age Limit, which is the retention period of the fetched data in days or hours. Select it as 0 to retain the last fetched data until the next successful fetch.
Select Enable Proxy to use a proxy server.
In Proxy Configuration:
9.1. Enter the proxy server IP Address and Port number.
9.2. Select either HTTP or HTTPS protocol.
Click Submit.

Enabling Custom CSV
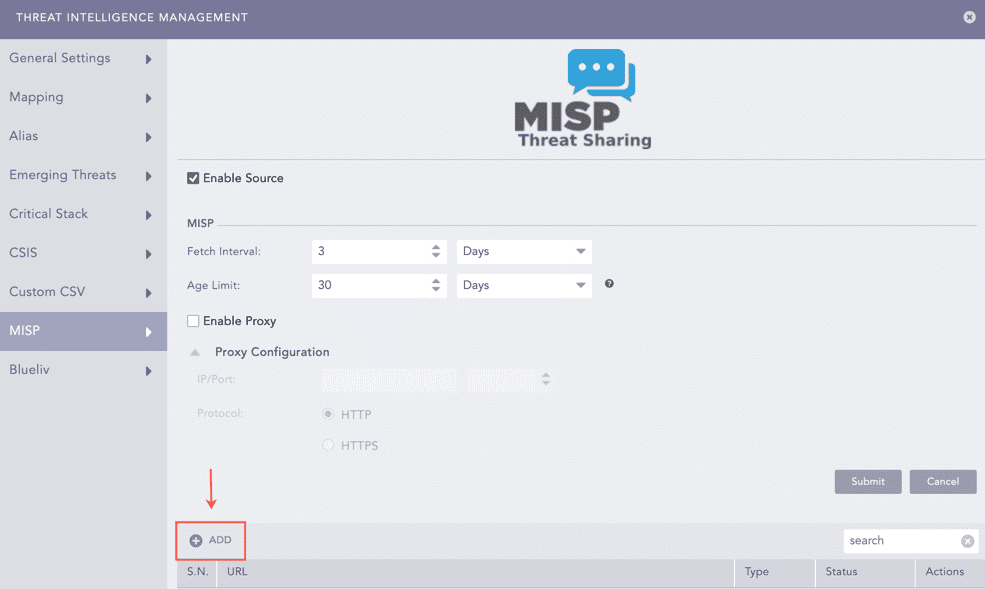
Go to Settings >> System Settings from the navigation bar and click Plugins.
Find Threat Intelligence and click Manage.
Select MISP.
Select Enable Source to activate MISP.
Select the frequency at which data is retrieved in Fetch Interval. It is measured in hours or days.
Select the Age Limit, which is the retention period of the fetched data in days or hours. Select it as 0 to retain the last fetched data until the next successful fetch.
Click Add.
Enabling MISP
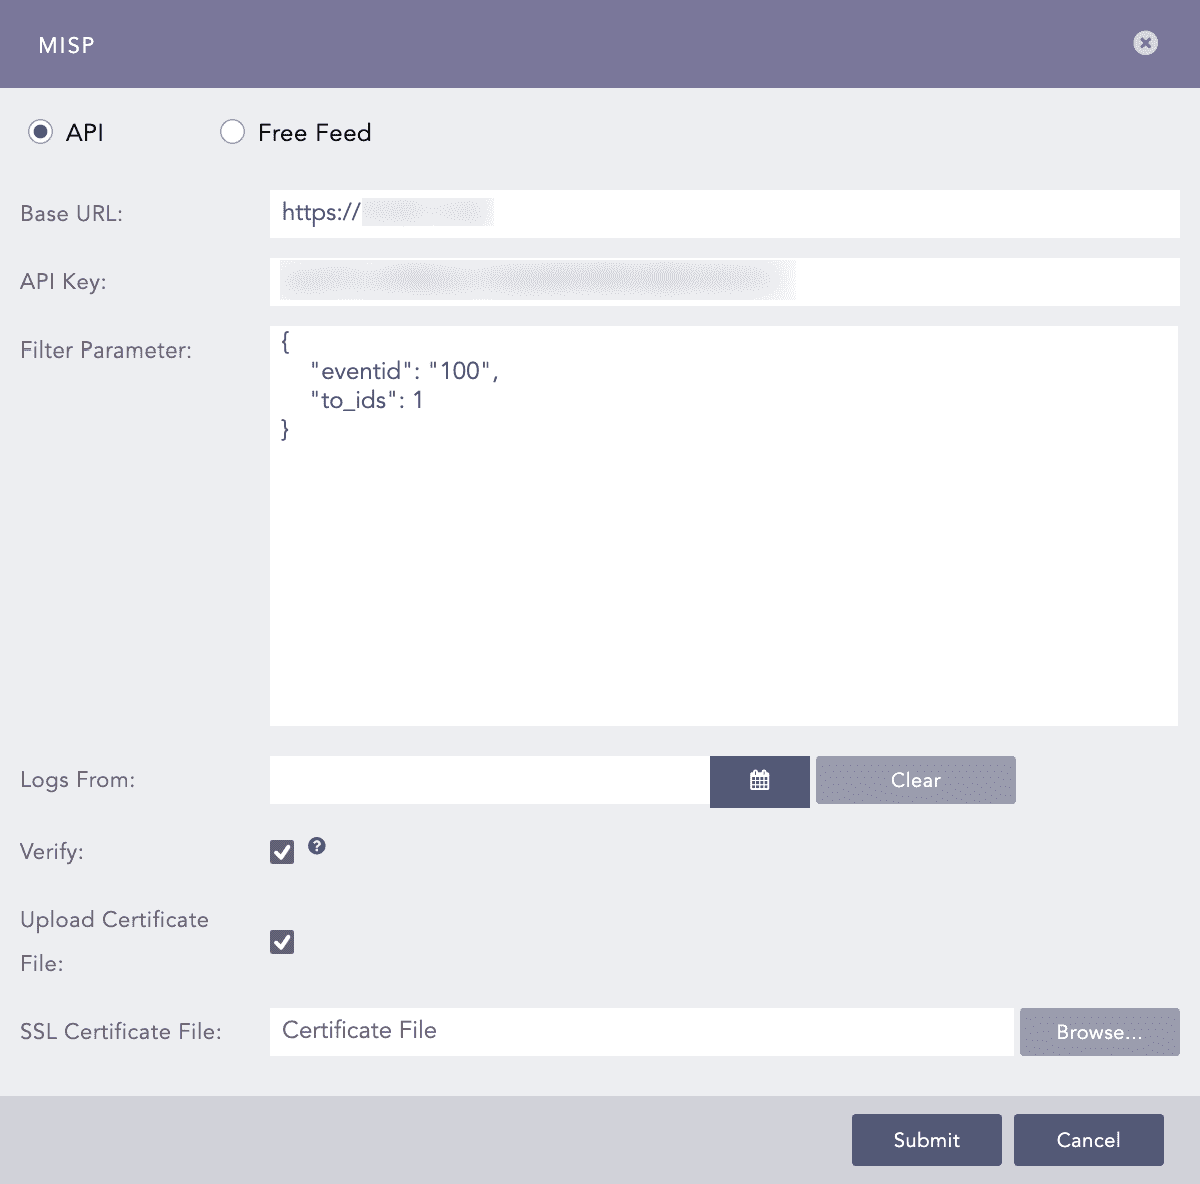
Select API to use an API key to fetch MISP feeds or select Free Feed to fetch free MISP feeds.
Threat Intelligence configures the Botvrij.eu free MISP feed by default. However, it is only configured if Threat Intelligence is newly installed or if MISP is not configured while upgrading Threat Intelligence.
If API is selected:
9.1. Enter the MISP Base URL and the API Key.
9.2. Enter the MISP source parameters in a JSON format in Filter Parameter to filter incoming logs. Go to the MISP documentation for the list of parameters.
9.3. Select a date from when Threat Intelligence is to fetch information in Logs From.
9.4. Select Verify to ensure a secure connection.
9.5. Select Upload Certificate File to use a self-signed SSL certificate.
9.6. Browse for the location of the self-signed SSL certificate and click Open.
9.7. Click Submit.
API
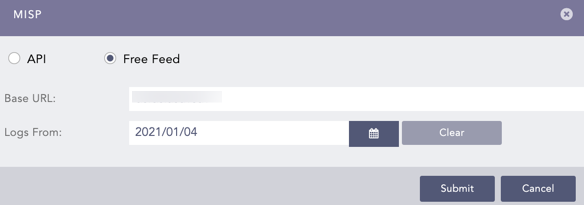
If Free Feed is selected:
10.1. Enter the MISP Base URL.
10.2. Select a date from when Threat Intelligence is to fetch information in Logs From.
10.3. Click Submit.
Free Feed
Select Enable Proxy to use a proxy server.
In Proxy Configuration:
12.1. Enter the proxy server IP Address and Port number.
12.2. Select either HTTP or HTTPS protocol.
Click Submit.
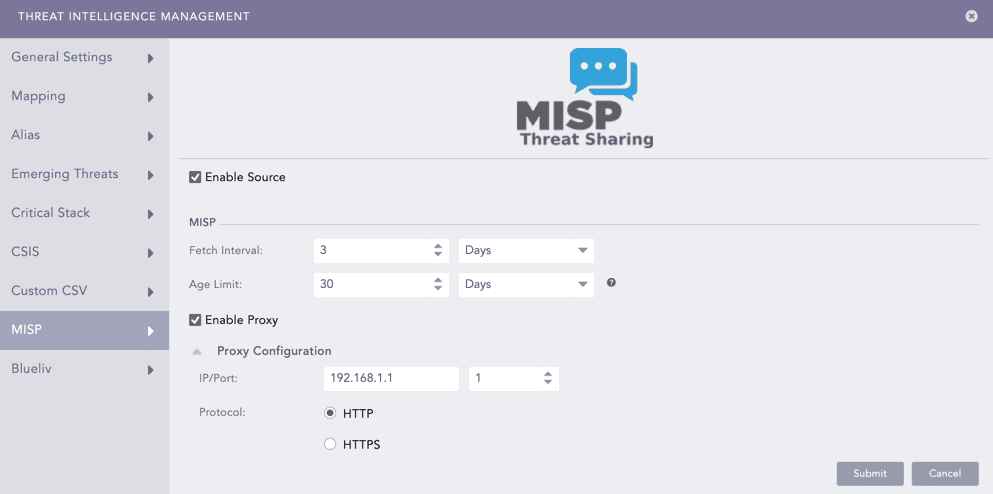
Enabling Proxy
Go to Settings >> System Settings from the navigation bar and click Plugins.
Find Threat Intelligence and click Manage.
Select BlueLiv.
Select Enable Source to activate Blueliv.
Enter the Blueliv Base URL and API Key.
Select the frequency at which data is retrieved in Fetch Interval. It is measured in hours or days.
Select the Age Limit, which is the retention period of the fetched data in days or hours. Select it as 0 to retain the last fetched data until the next successful fetch.
Select Enable Proxy to use a proxy server.
In Proxy Configuration:
9.1. Enter the proxy server IP Address and Port number.
9.2. Select either HTTP or HTTPS protocol.
Click Submit.
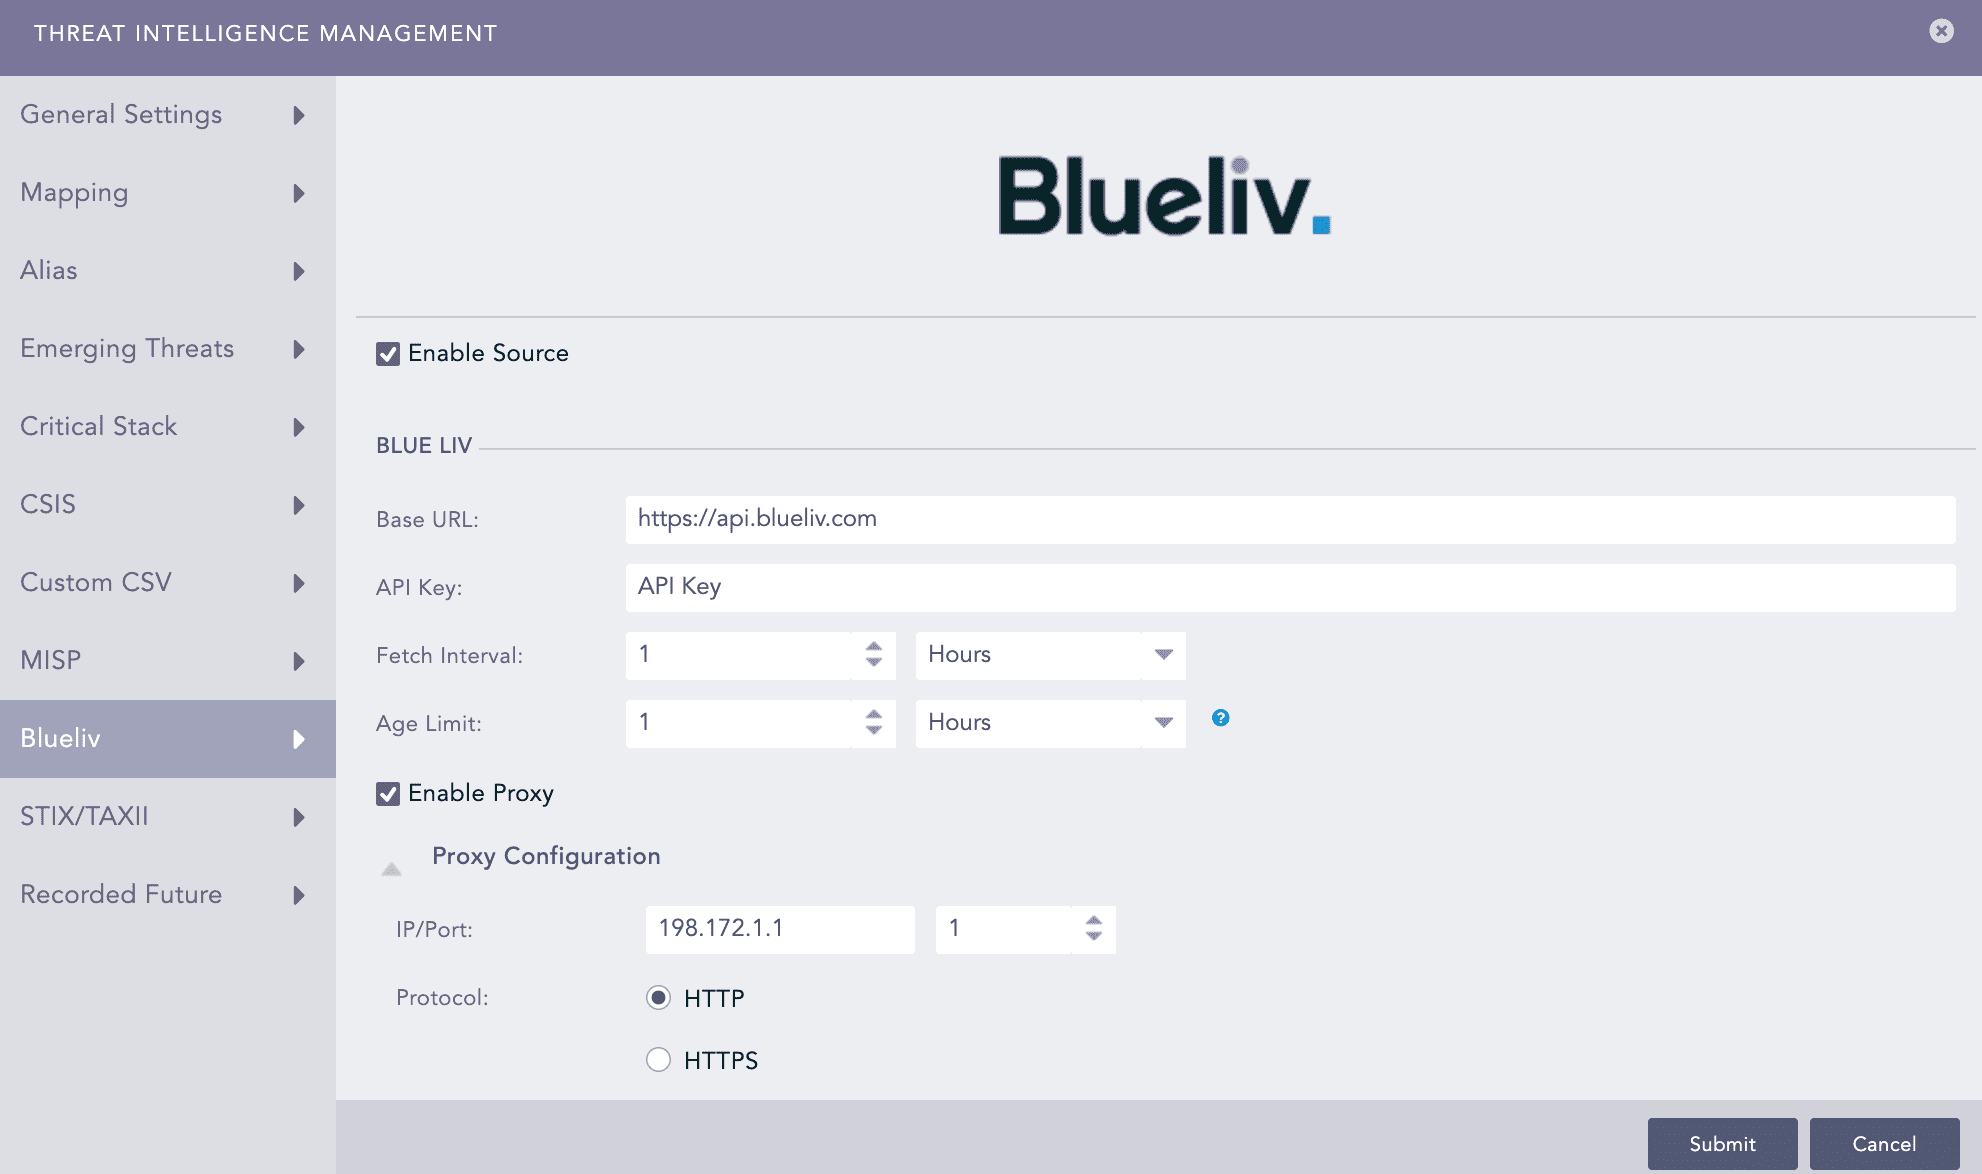
Enabling BlueLiv
Go to Settings >> System Settings from the navigation bar and click Plugins.
Find Threat Intelligence and click Manage.
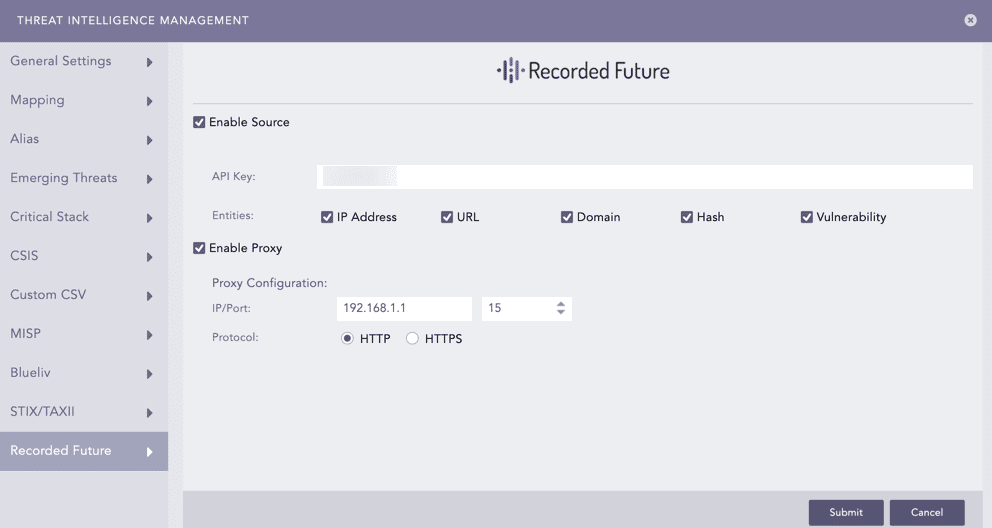
Select Recorded Future.
Select Enable Source to activate Recorded Future.
Enter the Recorded Future API Key.
Select the required Entities. Recorded Future fetches and stores data of the selected entities only.
Select Enable Proxy to use a proxy server.
In Proxy Configuration:
8.1. Enter the proxy server IP Address and Port number.
8.2. Select either HTTP or HTTPS protocol.
Click Submit.
Note
Go to Recorded Future for details about Recorded Future.
Enabling Recorded Future
Go to Settings >> System Settings from the navigation bar and click Plugins.
Find Threat Intelligence and click Manage.
Select StixTaxii.
Select Enable Source to fetch STIX data from a TAXII server.
Enter the Discovery URL, which is the location of the discovery service in the TAXII server.
Select Fetch From in months, hours or days. Threat Intelligence fetches data from the selected date.
Select the frequency at which data is retrieved in Fetch Interval. It is measured in hours or days.
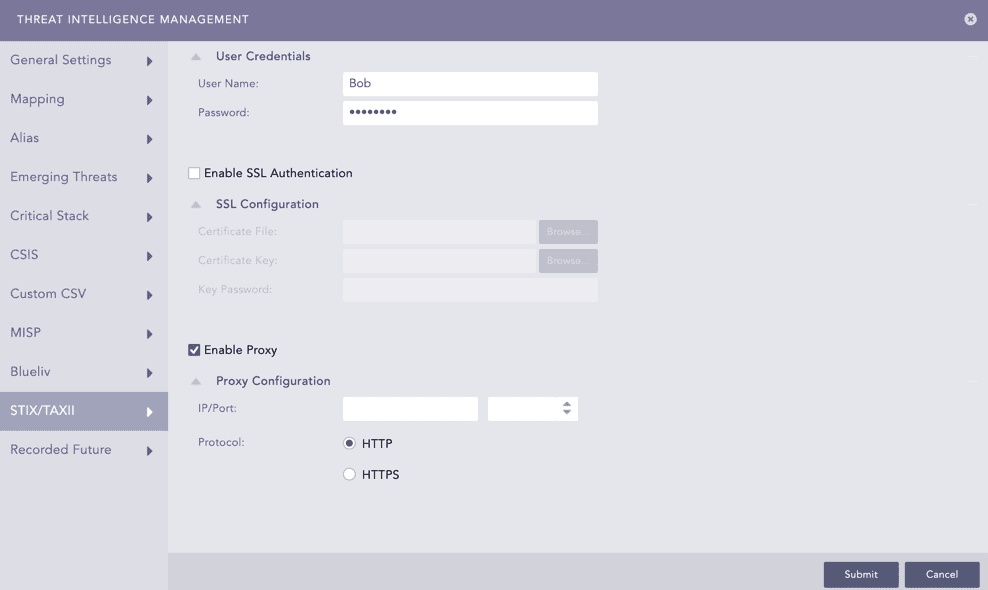
Select Enable Basic Authentication if the TAXII server uses basic authentication.
In User Credentials, enter the TAXII server User Name and Password.
Select Enable SSL Authentication if the TAXII server uses SSL authentication.
In SSL Configuration:
11.1. Upload the SSL certificate file in the Certification File and the SSL key file in the Certificate Key.
11.2. Enter the Key Password, which is the password used to decrypt the SSL key.
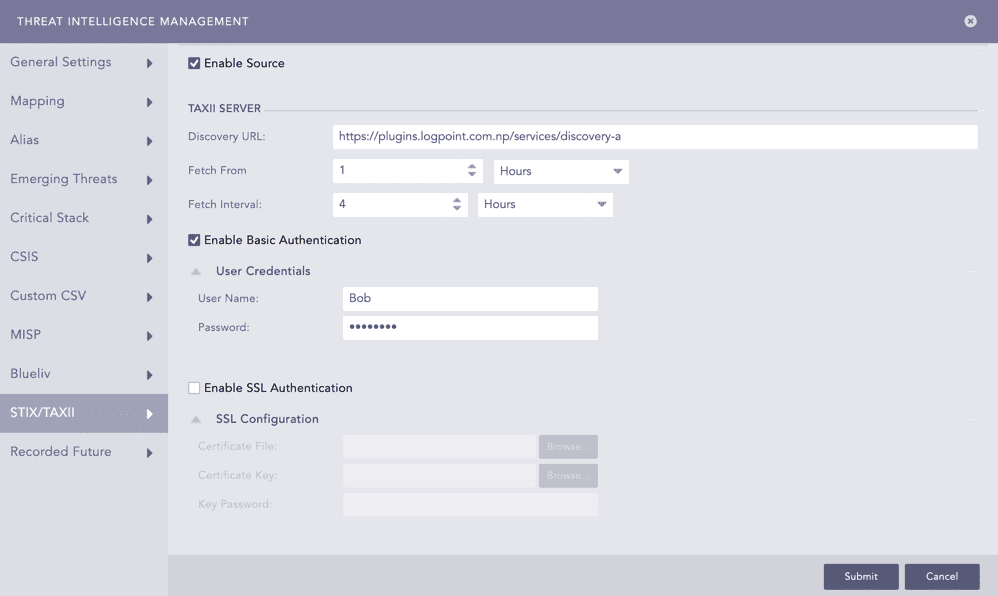
Configuring STIX
Select Enable Proxy to use a proxy server.
In Proxy Configuration:
13.1. Enter the proxy server IP Address and Port number.
13.2. Select either HTTP or HTTPS protocol.
Click Submit.
Enabling Proxy
Mapping enables you to standardize logs by assigning the fields of fetched information to the Logpoint Threat Intelligence Taxonomy fields. Threat Intelligence initially validates if you have mapped the field of a search query. If you have not mapped the field, Threat Intelligence searches the column with the same field name and enriches the logs.
The following fields are mapped by default:
source_address to ip_address
destination_address to ip_address
To map:
Go to Settings >> System Settings from the navigation bar and click Plugins.
Find Threat Intelligence and click Manage.
Select Mapping.
Click Add.
Enter the Key to map.
Enter the Column name from the Logpoint taxonomy to map the key.
Click Submit.
Important
You can only map one key value to one column of the Logpoint taxonomy.
You can enrich the mapped key using the following command:
| process ti(name_of_the_mapping_key)
For example:
| process ti(source_address)
| process ti(destination_address)
Alias enables you to assign a pseudoname to one or multiple fields of the fetched information.
To assign an alias:
Go to Settings >> System Settings from the navigation bar and click Plugins.
Find Threat Intelligence and click Manage.
Select Alias and click Add.
Enter the pseudoname in Alias.
Enter the name of one or more Fields to which the alias needs to refer.
Select a Mode of the display.
6.1. Select All to display both the enriched and unenriched logs.
6.2. Select Filter to display only the enriched logs.
Click Submit.
Note
Alias name is case-insensitive.
You can enrich the alias using the following command:
| process ti(*name_of_the_alias) or
| process ti(field, mode)
For example:
| process ti(*domains)
| process ti(*ports)
| process ti(source_address, filter)
| process ti(destination_address, all)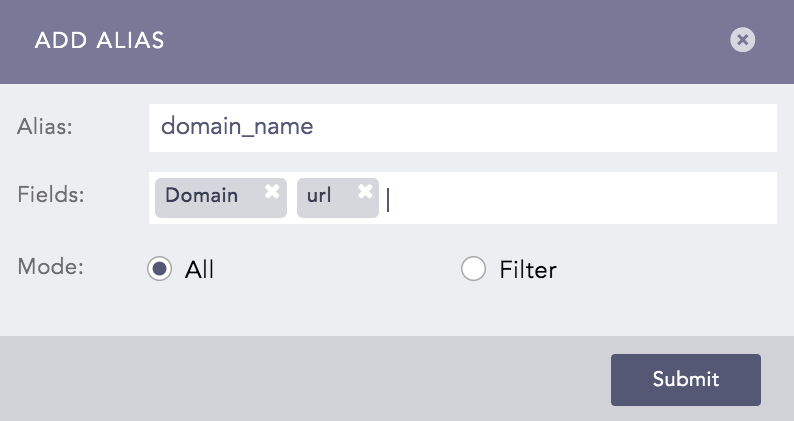
Adding Alia